Basic usage of toString() method of Object class and contains() method of list with example.

Did you just stumble upon this post???  we want to shout out loud that this post is for beginners, it shows the basic usage and if you find any mistakes don’t forget to shout back at us 🙂

First we will show you the basic usage of the overridden toString() found inside the Object class. You will find a lot of tutorials demonstrating the toString() functionality but nothing from the practical point of view.

Lets see an example from the application perspective such as you have a User class and you want to display the list of User inside a listview.

<code>

class User{

public String name;

public User(String name){

this.name = name;

}

}

</code>

Then inside your fragment/activity you would mostly populate the listview right… lets do that.

<code>

List<User> userList = new ArrayList<User>();

userList.add(new User(“abc”));

userList.add(new User(“cde”));

userList.add(new User(“efg”));

userList.add(new User(“xyz”));

ArrayAdapter mAdapter = new ArrayAdapter(context, android.R.layout.simple_list_item_1, userList);

setListAdapter(mAdapter); or  listview.setAdapter(mAdapter);

</code>

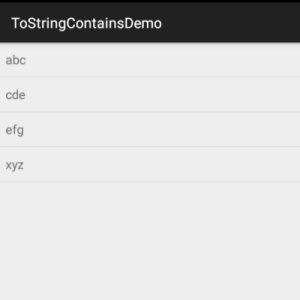
So we’re done setting the listview and the adapter. If you run the code at this point to check the output you would sure see some values but not the names.

Ex: packageName.className@hexaDecimalValueOfTheObject. as seen in the below screen-shot.

without_tostring

So what really happened here…all classes inherit the Object class indirectly/directly. The toString() method for class Object returns a string consisting name of the class of which the object is an instance, the at-sign character `@’, and the unsigned hexadecimal representation of the hash code of the object.

We don’t want to create a custom adapter or override the getView() method for such a simple listview.

A simple solution to this would be by overriding the toString() method inside your User class. So your new User class will look like this.

<code>

class User{

public User(String name){

this.name = name;

}

@Override

public String toString() {

return name;

}

}

</code>

Run the code to check the output. Wola you have the names in the listview 🙂

with_tostring


Let’s look at another interesting method that is java.util.List.contains, used very rarely and when used you may implement it wrongly. The contains() method works fine for the primitive data types but when it comes to custom data types it gets a bit tricky.

Lets look at an example,

We will use the same User class to demonstrate the use of contains() method. Now you want to check whether the user “efg” exists within the list or whether your list contains the name “efg”.

<code>

List<User> userList = new ArrayList<User>();

userList.add(new User(“abc”));

userList.add(new User(“cde”));

userList.add(new User(“efg”));

userList.add(new User(“xyz”));

userList.contains(new User(“efg”));

</code>

The contains() method returns a boolean value. The above code will return false though the list contains the value. In Order to work you need to override the equals() method inside the User class.

Example:

<code>

public class User {

public String name;

public User(String name){

this.name = name;

}

@Override

public String toString() {

return name;

}

@Override

public boolean equals(Object object) {

User model = (User) object;

if (model.name.equalsIgnoreCase(this.name) && object.getClass() == getClass())

return true;

return false;

}

}

</code>

Now userList.contains(new User(“efg”)); would return true. Important point to note inside equals() method is that you need to cast an object to the underlying class type and also both the object and underlying class has to be of the same type, else it won’t work.

Advanced level users can check our post on optimizing the listview here.

You can also find the attached sample project here.

Happy coding happy learning 🙂

Twitter tutorial covering hashtags, reply & favorite/un-favorite using twitter4j

This article is in continuation to our previous article which demonstrated user how to authenticate on twitter and post tweet with/without image using twitter4j. This article will help you understand on how to fetch tweets using hashtags and other twitter actions like tweet, re-tweet etc . So lets begin tweeting…I mean the tutorial 🙂 #letsBegin In social media everyone is aware of #hashtags, here we will explain how to fetch tweets for a particular hash tags. we are using “Query” class to fetch tweets.


Query query = new Query(“#android”);

Here, above code snippet is to fetch tweets containing “#android” hashtag. Multiple hashtags You can also fetch tweets for more than one hashtags, say you want to fetch tweets containing hashtag #code or #android,  you need to include both tags with keyword “OR”. for eg:  “#code OR #android” ,  “#code AND #android” Now lets see the above code in action.


Query query = new Query(hashtag);

query.count(10); //  Query will return only 10 tweets per request.

QueryResult queryResultObject = twitter.search(query);

List&lt;twitter4j.Status&gt; qrTweets = queryResultObject.getTweets();

queryResultObject.getTweets()  will return list of twitter4j.Status, which contains tweet data  like retweet count as well as tweet’s owner info. for eg: user screen name, profile image etc Here is code snippet to fetch tweet related data from status model.


status.getUser().getName(); // to get user name

status.getId();// to get tweet id

status.getUser().getScreenName(); // to get user screen name/ user handler

status.getText();// tweet

status.getFavoriteCount(); // favorite count

status.getRetweetCount();// retweet count

PAGINATION setMaxId(int) is useful to fetch next set of tweets . this method will  return tweets with status ids less than the given id.


query.setMaxId(lastSeenId);

TWITTER ACTIONS To perform actions like reply retweet you need to authenticate user on twitter. You can find a tutorial on how to authenticate user on twitter using twitter4j here 1] Favorite To perform fav action on any tweet  you  can use createFavorite() method with tweet id.


twitterInstance.createFavorite(mTweetId)

2] Re-tweet To re-tweet tweet  use  retweetStatus() method with tweet id.


twitterInstance.retweetStatus(mTweetId)

3] Reply To reply on a tweet use updateStatus() method with tweet id.


Twitter twitter = TwitterHelper.getTwitterInstance(mContext);

StatusUpdate statusUpdate = new StatusUpdate(mReplyText);

statusUpdate.inReplyToStatusId(mTweetId);

twitter.updateStatus(statusUpdate);

4] Un-favorite To un-favorite  any tweet  you  can use destroyFavorite() method with tweet id


twitterInstance.destroyFavorite(mTweetId)

Just follow the sample, and you’re ready to tweet. Any issues feel free to contact us. You can download working project from github. Happy Coding Happy Learning 🙂

Listview getViewType() and getViewTypeCount() in Action

This  is an article on listview with different view’s.

We all know that listview is the most used and conventional way of displaying list  of data in android. Many-a-times we do encounter a scenario where we want to display list item depending on a specific condition for example have a look at the images below.

The common way of displaying such a data is to inflate one row and depending on the condition you may hide or make a view visible.

Toggling a view between VIEW.GONE and VIEW.VISIBLE can be a very expensive task inside the getview(..) which will sure affect the list scroll. This can be easily managed and tackled with listview’s pre-defined methods getViewTypeCount() and getItemViewType(..).

So to begin with you need to create separate layouts for each type of view that will be displayed. This way it will be more efficient and less clustered to manage the data.

To put all this into action i have created a demo project which can be downloaded here.

In this project i ‘ m showing 3 different types of row in a listview:

1. A simple text

2. Text with image view

3. Poll with three option

so first create 3 different xmls for different row type.

  • view_row_type_one.xml (for text layout)
<TextView xmlns:android="http://schemas.android.com/apk/res/android"
 android:id="@+id/textview"
 android:layout_width="match_parent"
 android:layout_height="match_parent"
 android:layout_gravity="center"
 android:background="@android:color/darker_gray"
 android:textColor="@android:color/black"
 android:textSize="20sp"
 android:padding="10dp"/>

  • view_row_type_two.xml (layout with text and image )
<?xml version="1.0" encoding="utf-8"?>
<RelativeLayout xmlns:android="http://schemas.android.com/apk/res/android"
 android:layout_width="match_parent"
 android:layout_height="match_parent"
 android:background="@android:color/darker_gray"
 android:padding="10dp" >

<ImageView
 android:id="@+id/imageView"
 android:layout_width="100dp"
 android:layout_height="100dp"
 android:layout_centerInParent="true"
 android:layout_marginBottom="10dp"
 android:contentDescription="@null" />

<TextView
 android:id="@+id/labelTextView"
 android:layout_width="wrap_content"
 android:layout_height="wrap_content"
 android:layout_alignEnd="@id/imageView"
 android:layout_below="@id/imageView"
 android:layout_marginTop="15dp"
 android:textColor="@android:color/black"
 android:textSize="20sp" />

</RelativeLayout>

* view_row_type_three.xml (layout with radio buttons)

<?xml version="1.0" encoding="utf-8"?>
<RadioGroup xmlns:android="http://schemas.android.com/apk/res/android"
 android:layout_width="match_parent"
 android:layout_height="match_parent"
 android:background="@android:color/darker_gray"
 android:padding="10dp" >

<TextView
 android:id="@+id/questionTextView"
 android:layout_width="wrap_content"
 android:layout_height="wrap_content"
 android:layout_marginLeft="5dp"
 android:textColor="@android:color/black"
 android:textSize="20sp" />

<RadioButton
 android:id="@+id/radioButtonOne"
 android:layout_width="wrap_content"
 android:layout_height="wrap_content"
 android:text="@string/yes"
 android:textColor="@android:color/black"
 android:textSize="20sp" />

<RadioButton
 android:id="@+id/radioButtonTwo"
 android:layout_width="wrap_content"
 android:layout_height="wrap_content"
 android:text="@string/no"
 android:textColor="@android:color/black"
 android:textSize="20sp" />

<RadioButton
 android:id="@+id/radioButtonThree"
 android:layout_width="wrap_content"
 android:layout_height="wrap_content"
 android:text="@string/cant_say"
 android:textColor="@android:color/black"
 android:textSize="20sp" />

</RadioGroup>

What does getViewTypeCount() and getItemViewType(…) do ?

These methods are called before getView(…).

1] getViewTypeCount()

Returns the count of different type of views. Here we are having three different type of views so this method will return count as 3.

2] getItemViewType(…) 

Here we will write the logic to determine the type of view.

@Override

public int getItemViewType(int position) {

if(mList.get(position) instanceof DataModel){

return VIEW_TYPE_TEXT;

}else if(mList.get(position) instanceof ImageModel){

return VIEW_TYPE_IMAGE;

}else{

return VIEW_TYPE_QUESTION;
}

Inside getView(…) method first we determine the type of view by calling getItemViewType(..) method, this will return the type to be inflated as shown below.

@Override

public View getView(int position, View convertView, ViewGroup parent) {

ViewHolder.DataViewHolder dataViewHolder = null;

ViewHolder.ImageViewHolder imageViewHolder = null;

ViewHolder.QuestionViewHolder questionViewHolder = null;

int type = getItemViewType(position); // to determine type of view.

if(type == VIEW_TYPE_TEXT){

if(convertView == null){

convertView = mInflater.inflate(R.layout.view_row_type_one, parent, false);

convertView.setTag(dataViewHolder);

.................

}else{

dataViewHolder = (DataViewHolder)convertView.getTag();

........

}

}else if(type == VIEW_TYPE_IMAGE){

if(convertView == null){

convertView = mInflater.inflate(R.layout.view_row_type_two, parent, false);

convertView.setTag(imageViewHolder);

..........

}else{

imageViewHolder = (ImageViewHolder)convertView.getTag();

...............

}

}else{

if(convertView == null){

convertView = mInflater.inflate(R.layout.view_row_type_three, parent, false);

convertView.setTag(questionViewHolder);

.................

}else{

questionViewHolder = (ViewHolder.QuestionViewHolder)convertView.getTag();

.......

}

}

return convertView;

}

This is all it. You can follow this mechanism of displaying data and you will notice significant improvements in the list scroll and the number of objects created. Hope this is useful to someone.

Download sample project from here.

Happy coding, happy learning. 🙂

How to use tabwidget with fragments

This is a simple tutorial on how to use tabs with fragment in android application.

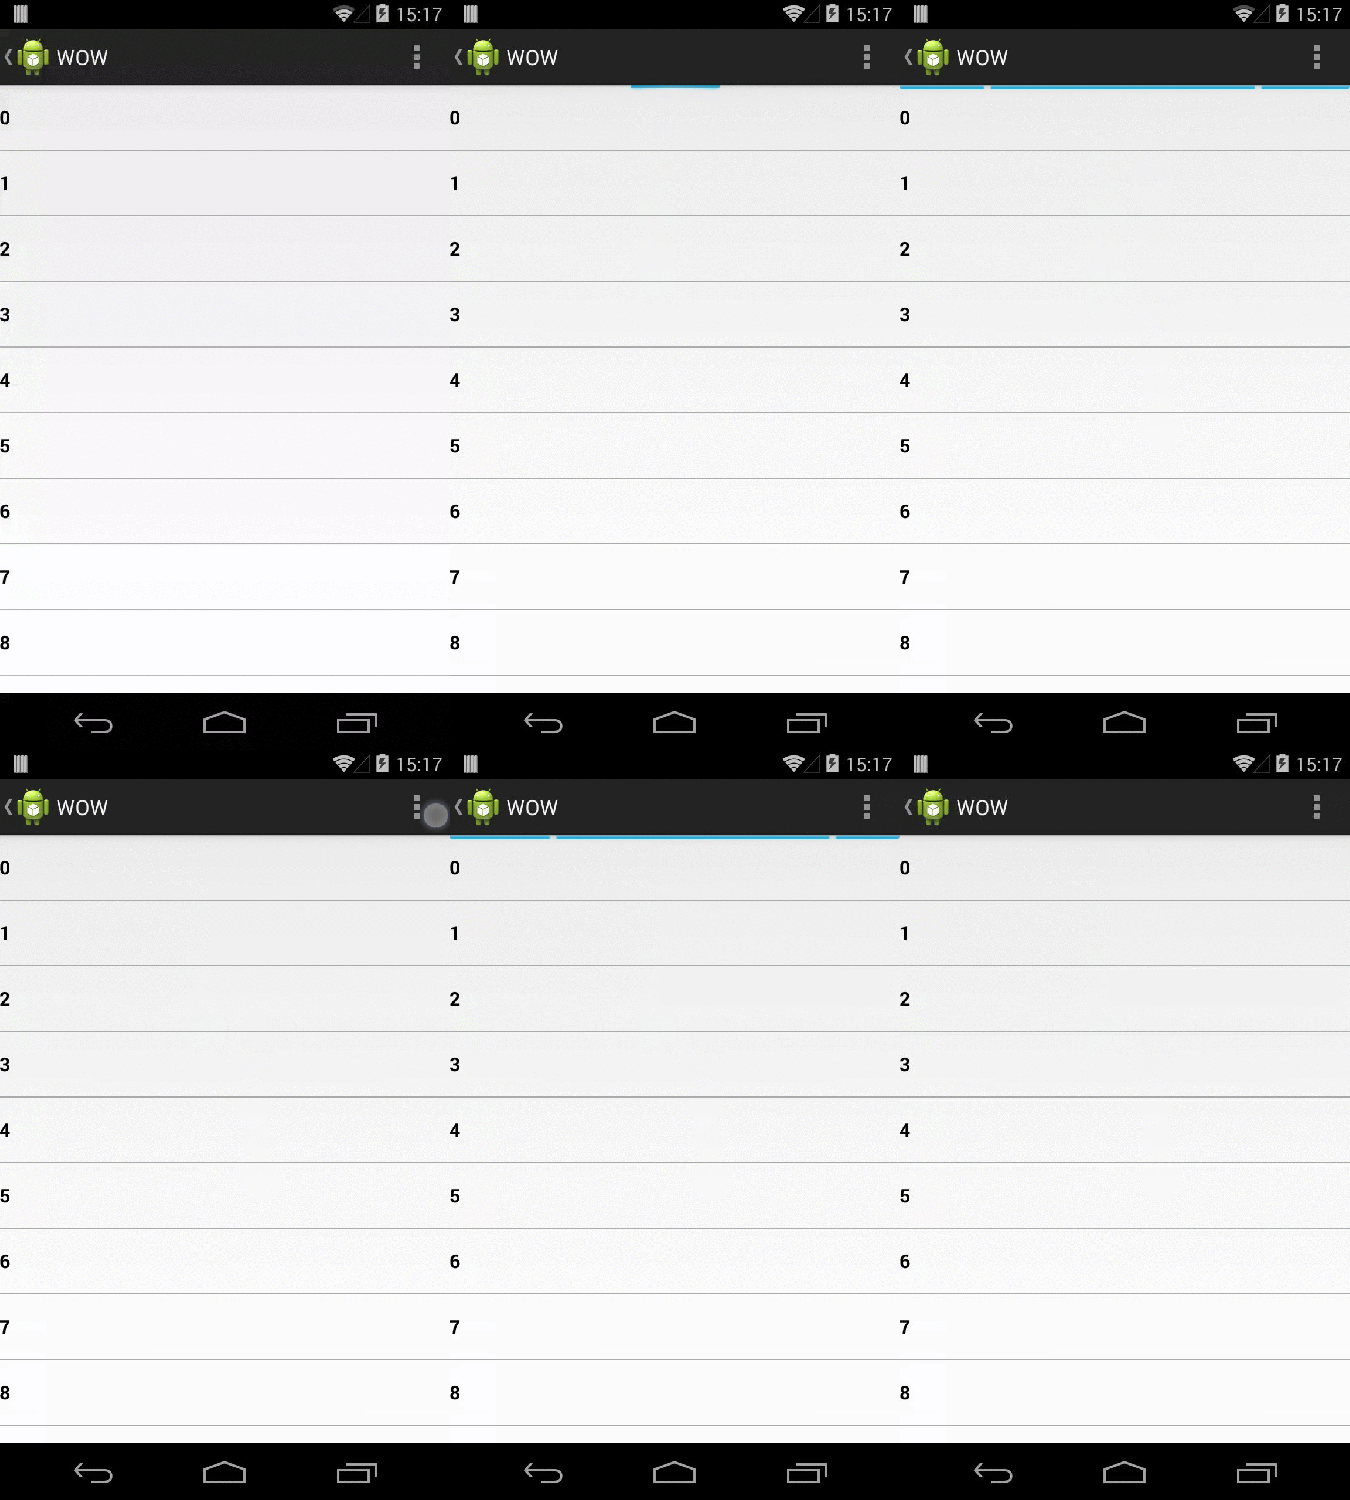
Final output

final output

In this application we are using fragment from android-support-v4.jar,  you are required to add android-support-v4.jar into your app.

1] Create a class lets say “BaseActivity” as we are using fragments to show tabs. BaseActivity class will extends “android.support.v4.app.FragmentActivity” class.

Here is xml file for BaseActivity class

<android.support.v4.app.FragmentTabHost
 android:id="@android:id/tabhost"
 android:layout_width="match_parent"
 android:layout_height="match_parent" >

<LinearLayout
android:layout_width="match_parent"
android:layout_height="match_parent"
android:orientation="vertical" >

<TabWidget
android:id="@android:id/tabs"
android:layout_width="match_parent"
android:layout_height="wrap_content"
android:orientation="horizontal" />

<FrameLayout
android:id="@android:id/tabcontent"
android:layout_width="match_parent"
android:layout_height="match_parent" />
</LinearLayout>

</android.support.v4.app.FragmentTabHost>

2] BaseActivity class

In onCreate() method first setup tabhost instance and then add tabs.

mTabHost = (FragmentTabHost) findViewById(android.R.id.tabhost);

mTabHost.setup(this, getSupportFragmentManager(), android.R.id.tabcontent);

mTabHost.addTab(mTabHost.newTabSpec("tab1").setIndicator(getResources().getString(R.string.tab_one)), TabOneFrgment.class, null);

mTabHost.addTab(mTabHost.newTabSpec("tab2").setIndicator(getResources().getString(R.string.tab_two)), TabTwoFrgment.class, null);

Here we are adding tabs in tabhost using addTab method

addTab method takes 3 parameter:

a] TabSpec instance :  you can define tab indicator, can assign a tag for this tab etc.

b] activity which you want to show when user clicks on this tab.

c] bundle instance

  • setIndicator(): here you can set text and or icon which will displayed on tab.

  • You can also add icon with tabs

 Ex : mTabHost.addTab(mTabHost.newTabSpec("tab2").setIndicator(getResources().getString(R.string.tab_two),

                getResources().getDrawable(R.drawable.ic_launcher)),TabTwoFrgment.class, null);

Tag a tab

By default tabs are shown in the same order as they were added in tabhost.

You can set a tab as current tab  by using setCurrentTabByTag method.

Ex : mTabHost.setCurrentTabByTag("tag2");

You can also show a tab by using tags :

Ex : TabOneFrgment tabOneFrgment = (TabOneFrgment) fragmentManager.findFragmentByTag("tab1");

fragmentTransaction.show(tabOneFrgment);

fragmentTransaction.commit();

How to navigate tabs???

Tab navigation has 2 aspects:

a] create a new fragment (add a fragment)

b] show already added fragment.

It is easy to create a new fragment on tab click but the trickiest part is to retain fragment state while changing tabs.

So in the sample app we are retaining fragment state whenever user changes a tab.

For this you need to add setOnTabChangedListener to the tab host.

Ex : mTabHost.setOnTabChangedListener(new OnTabChangeListener() {.....});

Inside setOnTabChangedListener we need check whether the intended fragment is already created (please refer fragment life cycle).

If fragment is already created  we just need to show that fragment else we will have to create a new fragment and hide current fragment.

 mTabHost.setOnTabChangedListener(new OnTabChangeListener() {

@Override
 public void onTabChanged(String tabId) {

android.support.v4.app.FragmentManager fragmentManager = getSupportFragmentManager();

TabOneFrgment tabOneFrgment = (TabOneFrgment) fragmentManager.findFragmentByTag("tab1");

TabTwoFrgment tabTwoFrgment = (TabTwoFrgment) fragmentManager.findFragmentByTag("tab2");

android.support.v4.app.FragmentTransaction fragmentTransaction = fragmentManager.beginTransaction();
if(tabId.equalsIgnoreCase("tab1")){

if(tabOneFrgment != null){

if(tabTwoFrgment != null){

fragmentTransaction.hide(tabTwoFrgment);

}

fragmentTransaction.show(tabOneFrgment);

}

}else{

if(tabTwoFrgment != null){

if(tabOneFrgment != null){

fragmentTransaction.hide(tabOneFrgment);

}

fragmentTransaction.show(tabTwoFrgment);

}

}

fragmentTransaction.commit();

}

});

Download sample project from here.
Happy Coding Happy Learning :)

Tutorial on uploading image on twitter using twitter4j

This tutorial walks you through the steps to post a tweet or a tweet with a image on twitter.

First and foremost you should have a valid twitter app configured correctly to post on twitter.

In case you don’t have an app on twitter, follow the steps below to create a simple twitter app and how to configure it correctly.

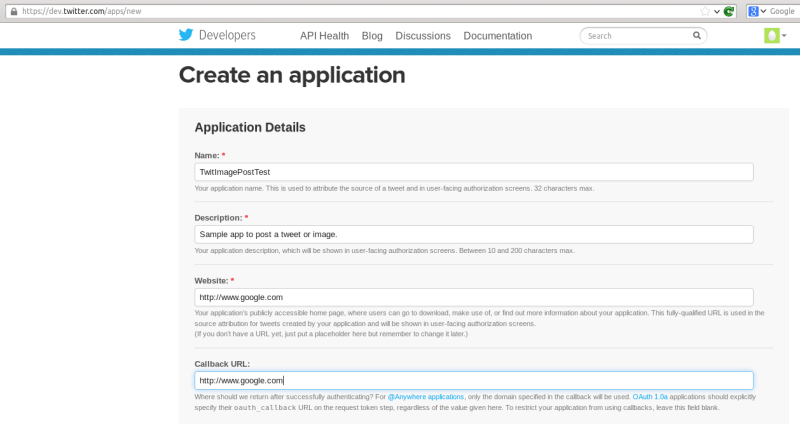
Step 1.  Goto https://dev.twitter.com/apps Click on create new application button.

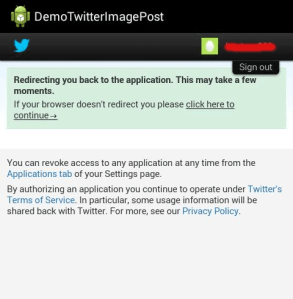
Then you will be presented the following page :

1_twit_create_app

Step 1

Fill in the details of your app.

Make sure you don’t leave the CallBack URL blank. A callback url is the one where your app will be redirected to from twitter; this is a test app so for time being you can specify something like eg: http://www.google.com . If you leave this field blank then your app wont be authorized.

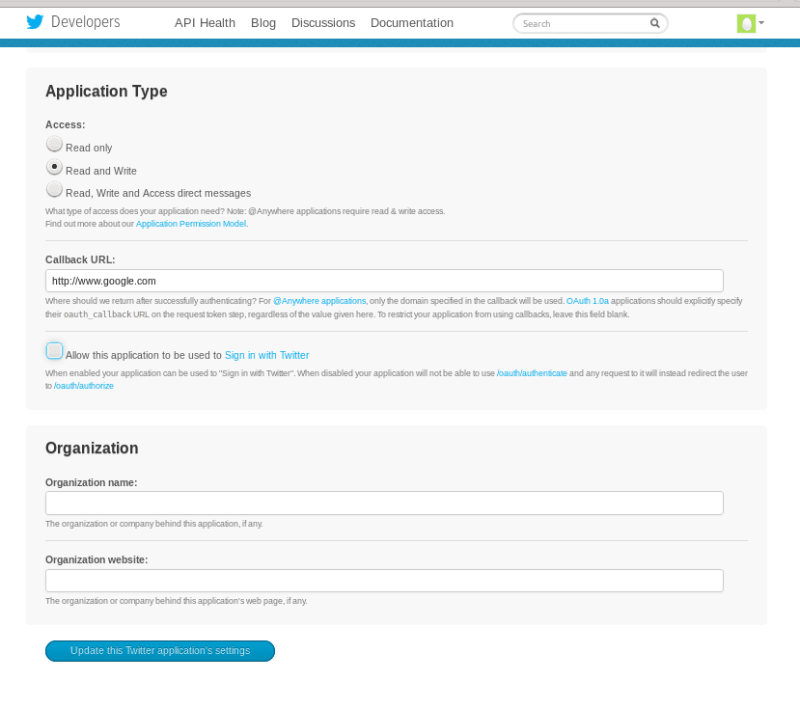
Step 2. Now its time to configure your app. Click on the settings tab. Scroll down to the

Application type section and change access to read and write.

2_twit_settings_app

Step 2

Click on the update settings button at the bottom to reflect the changes. Ideally it takes 10 – 15 seconds for the settings to get updated so be patient.

Step 3. Download twitter4J library from the following url http://twitter4j.org/en/index.html and add it to your libs folder.

Note: The zip contains other additional jars. From these we need only twitter4j-core and

twitter4j-media support jars.

3_twit_libs_eclipse

Step 3

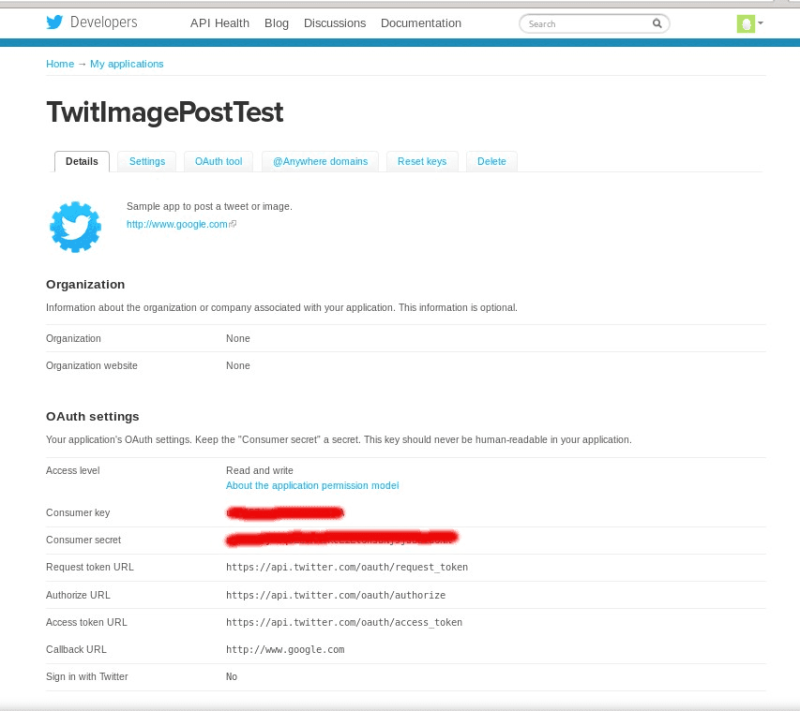
Step 4. Now lets get back to some coding. First you need to add the twitter consumer key and secret key to the Strings xml:

<string name = "twitter_consumer_key">YOUR_CONSUMER_KEY</string>
<string name= "twitter_consumer_secret">YOUR_CONSUMER_SECRET</string>
Step 4

Step 4

In our activity we have two buttons:

  • To post a tweet.

  • To post a tweet with image.

On button click we will check whether the app is already authorized if not we will authorize the app using a custom web view.

We will be using the custom webview to authorize the app so that once the app is authorized, you can finish the webview else you will be stuck with a common issue where the view remains opened even after the app is authorized.

Step 5

Step 5


The authorization logic is written in LoginActivity class.

Step 5. How to post a tweet/image on twitter ? Is this that tricky ? Lets have a look at it.

a. Post:

 ConfigurationBuilder configurationBuilder = new ConfigurationBuilder();

 configurationBuilder.setOAuthConsumerKey(context.getResources().getString(R.string.twitter_consumer_key));

 configurationBuilder.setOAuthConsumerSecret(context.getResources().getString(R.string.twitter_consumer_secret));

 configurationBuilder.setOAuthAccessToken(LoginActivity.getAccessToken((context)));

 configurationBuilder.setOAuthAccessTokenSecret(LoginActivity.getAccessTokenSecret(context));

 Configuration configuration = configurationBuilder.build();

 Twitter twitter = new TwitterFactory(configuration).getInstance();

 twitter.updateStatus(message);

b. Post with image:

ConfigurationBuilder configurationBuilder = new ConfigurationBuilder();

configurationBuilder.setOAuthConsumerKey(context.getResources().getString(R.string.twitter_consumer_key));

configurationBuilder.setOAuthConsumerSecret(context.getResources().getString(R.string.twitter_consumer_secret));

configurationBuilder.setOAuthAccessToken(LoginActivity.getAccessToken((context)));

configurationBuilder.setOAuthAccessTokenSecret(LoginActivity.getAccessTokenSecret(context));

Configuration configuration = configurationBuilder.build();

Twitter twitter = new TwitterFactory(configuration).getInstance();

StatusUpdate status = new StatusUpdate(message);

status.setMedia(file); // set the image to be uploaded here.

twitter.updateStatus(status);

As you can see posting is as simple as it can be. Further you can download live and functioning app.

Happy Coding Happy Learning 🙂

Code snippet to save/fetch data from file system

To save data from file system you need to add write access storage system permission in application’s manifest.

You can write data in internal as well as on external sd card.

Code to write data on disc


 protected static void saveDataOnDisk(String data) {

ByteArrayOutputStream byteArrayOutputStream = new ByteArrayOutputStream();

try {

ObjectOutput objectOutput = new ObjectOutputStream(byteArrayOutputStream);

objectOutput.writeObject(data);

byte[] buffer = byteArrayOutputStream.toByteArray();

File loginDataFile = (new File(filePath)); // file path where you want to write your data

loginDataFile.createNewFile();

FileOutputStream fileOutputStream = new FileOutputStream(loginDataFile);

fileOutputStream.write(buffer);

fileOutputStream.close();

objectOutput.flush();

objectOutput.close();

byteArrayOutputStream.flush();

byteArrayOutputStream.close();

Log.i(“SAVE”, ”———————-DONE SAVING”);

} catch(IOException ioe) {

Log.i(“SAVE”, “———serializeObject|”+ioe);

}

}

Here is code snippet to save bitmap data on file system


File file = new File(filePath); // file path where you want to // save data.

FileOutputStream fileOutputStream = new FileOutputStream(file);

bitmap.compress(Bitmap.CompressFormat.PNG, 100, fileOutputStream); //bitmap is Bitmap object which you want to save on disc.

fileOutputStream.flush(); fileOutputStream.close();

code to fetch Data From disc

private static Object getDataFromDisk() {

try {

FileInputStream fileInputeStream = new FileInputStream(FilePath);

ObjectInputStream objectInputStream = new ObjectInputStream(fileInputeStream);

Object data = (Object) objectInputStream.readObject();

objectInputStream.close();

fileInputeStream.close();

return dataModel;

} catch (Exception error) {

Log.i(“FETCH”, ”—-getDataFromDisk———ERROR while reading|” + error);

}

return null;

}

Gmail like pull to refresh

Hey  All Here is our new library which has gmail like refresh functionality.

It’s a simple & fully customizable library  which you can use  in your app easily

You can download library & sample project from github.

gmail like pull to refresh

gmail like pull to refresh

*Steps for usage.

1] Here is the code snippet


CustomView view = new CustomView(getApplicationContext(), actionBar);

setContentView(view);

view.setRefreshListner(SampleForGmailLIkePullToRefresh.this);

view.setActionBar(SampleForGmailLIkePullToRefresh.this);

view.getListView().setAdapter(new DummyAdapter(this)); //set adapter to list.

You can implement IRefreshListner interface which has two methods preRefresh() postRefresh() which will be invoked when loading starts and stops respectively.

You can use these methods to write logic which will be executed before and after refreshing.

Little more about CustomView class

We have exposed following  useful methods of CustomView class.

  • startLoading()  to start refreshing/loading explicitly.
  • stopLoading()  to stop refreshing/loading explicitly.
  • getListView()  this will return listview.

Its an Apache License, Version 2.0 library so you can use it in your apps the way you want. Let us know in case of any issues. Download this library from  github.

Happy Coding Happy Learning 🙂

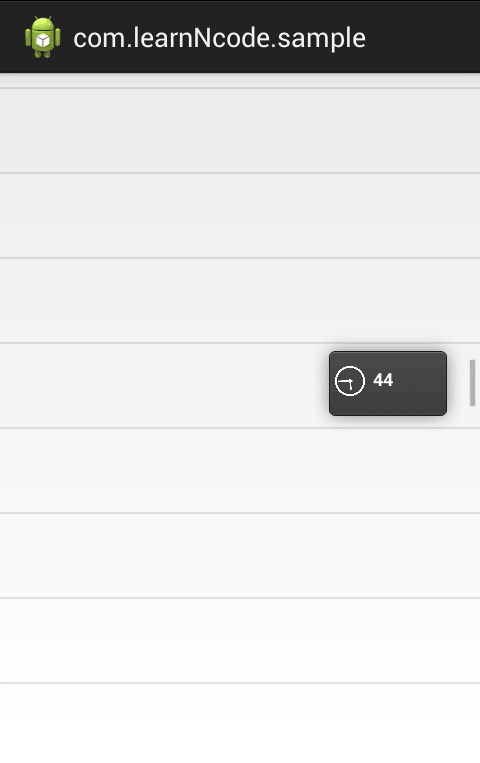
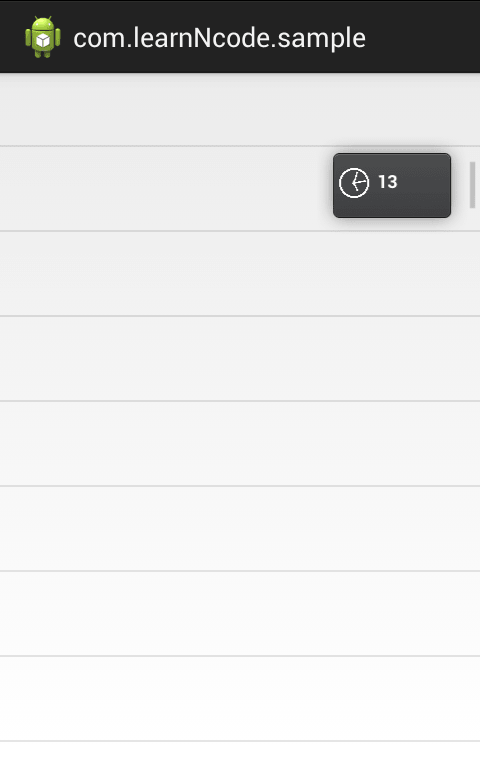
Path like scrollbar with clock widget

Here is our library which you can use to add Path app like little clock that slides up and down the right-hand side of the screen as you scroll down the timeline. You can also add little data in the scroll panel along with fully customizable clock.

You can download library from github page.

Wthout second hand

Without second hand


With second hand Overview

With second hand Overview

We have used an open source library Android-ScrollBarPanel to show a scrollbar-panel. So here we go …

we have a clock class which is used to show clock  on a list view panel,

by using clock class methods you can easily customize the clock widget .

*Steps for usage.

1] Use ExtendedListView view instead of normal listview.

The ExtendedListView replaces a standard ListView widget and provides the ScrollBarPanel capability.

Here’s the xml file snippet

<com.learnNcode.android.ExtendedListView

xmlns:clock="http://schemas.android.com/apk/res-auto"

android:id="@android:id/list"

android:layout_width="fill_parent"

android:layout_height="fill_parent"

android:choiceMode="singleChoice"

clock:hand_second="@drawable/ic_timer_clock_minute_hand"

clock:scrollBarPanel="@layout/scrollbarpanel"

clock:scrollBarPanelInAnimation="@anim/in"

clock:scrollBarPanelOutAnimation="@anim/out" />

As you can see we have added some custom attributes for clock widget (more information about custom attributes at bottom ).

2] You can use/edit the clock widget the following way, this should be done in the layout for scrollbar panel:

Here’s the xml file snippet:

<com.learnNcode.android.Clock

xmlns:clock="http://schemas.android.com/apk/res-auto"

android:id="@+id/analogClockScroller"

android:layout_width="25dp"

android:layout_height="25dp"

clock:hand_second="@drawable/ic_timer_clock_minute_hand"

clock:hand_minute="@drawable/ic_timer_clock_minute_hand"

clock:hand_hour="@drawable/ic_timer_clock_hour_hand"

clock:hand_dial="@drawable/ic_timer_clock_dialer"/>

You can also set drawables  for second, minute and hour hand programmatically using setImages(..) method. Also you can set drawables individually for each needle as well as clock dial.

3] Implement onPositionChangeListner this listener will  be called every time you scroll listview.

Here’s the snippet.

ExtendedListView mListView = (ExtendedListView) findViewById(android.R.id.list);

mListView.setOnPositionChangedListener(this);

Every time you scroll the list, this onPositionChanged listener get’s called in  onPositionChanged()

Then you create a clock class instance to update clock widgets value

Here is the code snippet for onPositionChanged.

@Override
public void onPositionChanged(ExtendedListView listView, int position, View scrollBarPanel) {

Clock analogClockObj = (Clock) scrollBarPanel.findViewById(R.id.analogClockScroller);

// this textview you can use to some data on list scroll panel.
TextView tv = (TextView) scrollBarPanel.findViewById(R.id.timeTextView);

tv.setText(""+position);

//this is set visibility of second hand.
analogClockObj.setSecondHandVisibility(false);

// to visible clock widget
analogClockObj.setVisibility(View.VISIBLE);

// here set Time class object with value. this time will be set as time on clock.
Time timeObj = new Time();

timeObj.set(position + 3, position, 5, 0, 0, 0);

analogClockObj.onTimeChanged(timeObj);

}

Done with clock widget:)))

** little more about clock class :

You can customize clock widget through this class .

This is fully customizable clock widget you can alter its resource through methods or  xml file.

We have exposed some basic methods which are useful to customize your clock widget

like setSecondHandVisibility(boolean) method which is used to make second hand gone or visible.

Its an Apache License, Version 2.0 library so you can use it in your apps the way you want. Let us know in case of any issues. Download this library from  github.

Happy Coding Happy Learning 🙂